Web applications with automatic TLS certificates and GitHub OAuth2
“Web applications with TLS and OAuth2 on Kubernetes? Surely you’re joking, Mr. JamesClonk!”
I’ve been ranting a lot recently about how inferior Kubernetes is compared to Cloud Foundry. There isn’t any redeeming factor, not a single thing it does even remotely as well as CF when it comes to the developer experience in terms of running web applications. Its inherent complexity requires an insane amount of DevOps / operations overhead by comparison.
Kubernetes is a great tool from an Infrastructure-as-a-Service perspective. No vendor lock-in, platform agnostic, a standardized framework for building on top of any infrastructure, etc.. This is all great, but the misconception a lot of people seem to have (especially the more removed they are from any day-to-day engineering work) is that it is also a Platform-as-a-Service by itself, and that’s the area it falls completely flat. There’s just zero batteries included in a vanilla K8s installation.
But now that the world has converged on using Kubernetes, what can we do to at least alleviate the most obvious and painful points with using it for running web apps?
We will install an ingress controller, a certificate manager and an oauth proxy. 😀
Ingress Controller
What is an ingress controller?
An ingress controller is an extra component that’s necessary to be installed on your Kubernetes cluster if you want to make use of Ingress resources. Ingress controllers are not part of Kubernetes itself, and there’s many different ones available, for example NGINX, HAProxy, Contour, Traefik, Gloo, etc.. The most common one probably being ingress-nginx, which uses NGINX internally for handling traffic and routing.
The Ingress resource then enables us to expose HTTP and HTTPS routes from outside the cluster to services within the cluster. Traffic routing is controlled by rules defined on such Ingress resources.
Installation of ingress-nginx is rather easy and straightforward. You can either use the provided Helm chart, or just directly apply the standalone deployment manifest:
kubectl apply -f https://raw.githubusercontent.com/kubernetes/ingress-nginx/controller-v1.3.0/deploy/static/provider/cloud/deploy.yaml
That’s it, it doesn’t really require any customization or configuration by default. We’ve got our first ingress-controller up and running:
$ kubectl -n ingress-nginx get all
NAME                                READY   STATUS      RESTARTS   AGE
pod/ingress-nginx-7de24cbef-sdv9q   1/1     Running     1          234d

NAME                    TYPE        CLUSTER-IP      EXTERNAL-IP   PORT(S)                      AGE
service/ingress-nginx   NodePort    10.43.134.29    <none>        80:31370/TCP,443:31422/TCP   423d

NAME                            READY   UP-TO-DATE   AVAILABLE   AGE
deployment.apps/ingress-nginx   1/1     1            1           423d
Note: A keen observer might have realized something odd about the output above. Why is it a NodePort and not a LoadBalancer (or ClusterIP). Well, I actually did do some customization for my installation, I’ve configured it to a) use HostPorts for the Pods, and b) be exposed via NodePorts externally too. I’m running that controller on a single-node cluster and explicitly do not want to use a cloud-provider LoadBalancer, so this makes sense there.
Cert-Manager
Next step: cert-manager.io
Yet another controller we’ll need to install, but quite a useful one though. Cert-Manager will handle all TLS certificate madness and automation for you, and allow you to use free Let’s Encrypt certificates for using HTTPS with all web applications you have running on your cluster. It will automatically obtain certificates from Let’s Encrypt and ensure these are valid, up-to-date and will renew them before they expire.
Same thing as before, installation is simple and straightforward and doesn’t require any customization. Just apply the standalone deployment manifest again:
kubectl apply -f https://github.com/cert-manager/cert-manager/releases/download/v1.9.1/cert-manager.yaml
$ kubectl -n cert-manager get all
NAME                                           READY   STATUS    RESTARTS   AGE
pod/cert-manager-webhook-f88ccb77f-xctfm       1/1     Running   1          234d
pod/cert-manager-6f6bd879b7-npbtc              1/1     Running   1          234d
pod/cert-manager-cainjector-55b4759d9c-znz6m   1/1     Running   1          234d

NAME                           TYPE        CLUSTER-IP     EXTERNAL-IP   PORT(S)    AGE
service/cert-manager           ClusterIP   10.43.44.0     <none>        9402/TCP   617d
service/cert-manager-webhook   ClusterIP   10.43.254.39   <none>        443/TCP    617d

NAME                                      READY   UP-TO-DATE   AVAILABLE   AGE
deployment.apps/cert-manager-webhook      1/1     1            1           617d
deployment.apps/cert-manager              1/1     1            1           617d
deployment.apps/cert-manager-cainjector   1/1     1            1           617d
What we now need to do though as a second step is to create a ClusterIssuer for using Let’s Encrypt via ACME. But again, this is pretty straightforward and all that’s needed is this:
cluster-issuer.yml
---
apiVersion: cert-manager.io/v1
kind: ClusterIssuer
metadata:
  name: lets-encrypt
  namespace: cert-manager
spec:
  acme:
    # use Let's Encrypt
    server: https://acme-v02.api.letsencrypt.org/directory
    email: my-email@my-domain.com
    privateKeySecretRef:
      name: lets-encrypt
    solvers:
    # use a http01 solver with our ingress-nginx (https://cert-manager.io/docs/configuration/acme/http01/)
    - http01:
        ingress:
          class: nginx
Once we’ve applied that yaml file the ClusterIssuer is ready to be used.
GitHub OAuth2
All of the above so far enables us to expose our web applications via HTTPS routes to the internet. “But what about security? I don’t want my admin dashboard to be available to anyone!”
No worries, that’s where we’re going to setup OAuth2 authentication and authorization for accessing those web applications. The benefit for you of doing this on the Kubernetes cluster’s ingress routing layer is that you do not need to write any specific code in your applications for dealing with logins or authentication of any kind. It’s completely transparent to the web app itself.
The most commonly used standard for this procedure in web applications is to use OAuth2 with an external provider. Since we are nerdy developers of course we are going to be using GitHub as our OAuth2 provider. 🤓
We need to create and setup a GitHub OAuth2 application for that, but this is again pretty straightforward and well documented here: https://docs.github.com/en/developers/apps/building-oauth-apps/creating-an-oauth-app
Just follow that guide, fill our out some values and click some buttons. The important thing is that we anticipate what our OAuth2 callback URL is going to look like. We’ll deploy oauth2-proxy further down and will register it with an Ingress on the route oauth2-proxy.my-domain.com, thus the callback URL is expected to be https://oauth2-proxy.my-domain.com/oauth2/callback
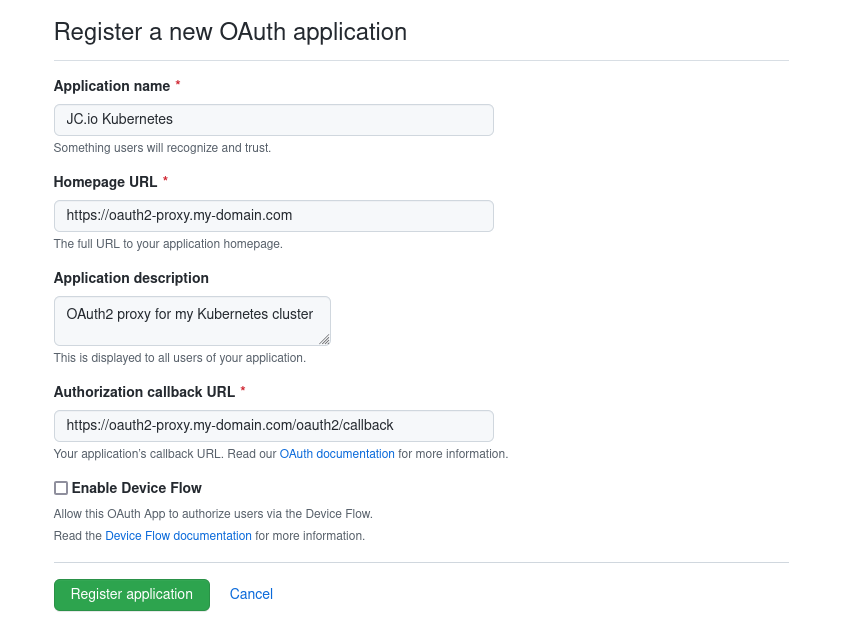
Don’t forget to create a new set of credentials that we’ll use in oauth2-proxy. Write down the Client ID and Client secret, we need those in the next step.

oauth2-proxy
Now that we’ve created a GitHub OAuth2 application we need something that’s able to talk to it and do the whole mystical OAuth dance. This is where oauth2-proxy comes into play.
oauth2-proxy is a simple reverse proxy that provides authentication using various OAuth2 providers such as Google, GitHub, GitLab, and many others. Together with NGINX we can have it running on Kubernetes and configured to be in front / in the path of traffic to any other web application we want, granting access to them through OAuth2 authentication.
Since we’ve previously created a GitHub OAuth2 application, we are going to configure oauth2-proxy to use that one. The GitHub specific documentation can be found here: https://oauth2-proxy.github.io/oauth2-proxy/docs/configuration/oauth_provider#github-auth-provider
For a quick deployment we’re going to use this Helm chart as our basis.
There’s two important things we need to properly configure. These are the Secret, containing our GitHub OAuth2 application Client ID and Client Secret, and the ConfigMap, containing the the GitHub provider configuration for oauth2-proxy, for example like this:
oauth2-proxy-configuration.yml
---
apiVersion: v1
kind: Secret
metadata:
  name: oauth2-proxy-secrets
  namespace: oauth2-proxy
type: Opaque
stringData:
  # read https://oauth2-proxy.github.io/oauth2-proxy/docs/configuration/overview#generating-a-cookie-secret
  cookie-secret: <my-cookie-secret>
  # these should be the values from our previous GitHub OAuth2 app we've created
  client-secret: <my-github-oauth2-app-client-secret>
  client-id: <my-github-oauth2-app-client-id>

---
apiVersion: v1
kind: ConfigMap
metadata:
  name: oauth2-proxy-config
  namespace: oauth2-proxy
data:
  oauth2_proxy.cfg: |-
    reverse_proxy = "false"
    redirect_url = "https://oauth2-proxy.my-domain.com/oauth2/callback"

    upstreams = "file:///dev/null"
    email_domains = "my-domain.com"

    provider = "github"
    github_org = "my-github-org"
    github_users = "MyGitHubUsername"

    whitelist_domains=".my-domain.com"
    cookie_domains = ".my-domain.com"

    cookie_expire = "168h"
    cookie_secure = "true"
    cookie_httponly = "true"
    cookie_samesite = "lax"

    skip_provider_button="false"
After deploying it we should have oauth2-proxy up and running:
$ kubectl -n oauth2-proxy get all
NAME                               READY   STATUS    RESTARTS   AGE
pod/oauth2-proxy-5cd58b4dd-8bn2m   1/1     Running   1          287d

NAME                   TYPE        CLUSTER-IP   EXTERNAL-IP   PORT(S)              AGE
service/oauth2-proxy   ClusterIP   10.43.48.9   <none>        4180/TCP,44180/TCP   287d

NAME                           READY   UP-TO-DATE   AVAILABLE   AGE
deployment.apps/oauth2-proxy   1/1     1            1           287d
Finally, we also need to create an Ingress resource so that oauth2-proxy can be accessed on our domain/hostname:
oauth2-proxy-ingress.yml
---
apiVersion: networking.k8s.io/v1
kind: Ingress
metadata:
  name: oauth2-proxy
  namespace: oauth2-proxy
  annotations:
    # enforce TLS/HTTPS
    nginx.ingress.kubernetes.io/ssl-redirect: "true"
    nginx.ingress.kubernetes.io/force-ssl-redirect: "true"
    nginx.ingress.kubernetes.io/server-snippet: |
      large_client_header_buffers 4 32k;
    # instruct ingress-nginx and cert-manager to use the clusterissuer we've created earlier for TLS certificates
    cert-manager.io/cluster-issuer: "lets-encrypt"
spec:
  ingressClassName: nginx
  tls:
  - secretName: oauth2-proxy-ingress-tls
    hosts:
    - oauth2-proxy.my-domain.com # what certificate should cert-manager request from Let's Encrypt
  rules:
  - host: oauth2-proxy.my-domain.com
    http:
      paths:
      - path: /
        pathType: Prefix
        backend:
          service:
            name: oauth2-proxy
            port: 4180
See the section below about Ingress annotations to fully understand what’s going on here. There’s a lot of magic involved behind the scenes by using an Ingress with these special annotations.
Once the Ingress has been created though and cert-manager has issued a Let’s Encrypt certificate for oauth2-proxy.my-domain.com, we can check if it’s available and responding properly:
$ curl https://oauth2-proxy.my-domain.com/ping
OK

$ curl https://oauth2-proxy.my-domain.com/ping -I
HTTP/2 200
Ingress annotations
Now that we have cert-manager and oauth2-proxy up and running it’s time to create a “route” for accessing an actual web app we want to expose and have authentication for. Let’s pick Grafana for example.
On my example K8s cluster I already have it running in the grafana namespace:
$ kubectl -n grafana get all
NAME                          READY   STATUS    RESTARTS   AGE
pod/grafana-d546f875b-8whml   1/1     Running   4          471d

NAME              TYPE        CLUSTER-IP      EXTERNAL-IP   PORT(S)   AGE
service/grafana   ClusterIP   10.43.220.120   <none>        80/TCP    617d

NAME                      READY   UP-TO-DATE   AVAILABLE   AGE
deployment.apps/grafana   1/1     1            1           617d
In order to expose this Grafana instance publicly we have to create an Ingress resource. This resource is what’s going to instruct the ingress-nginx controller to route all traffic for a specific domain/hostname to the Grafana service in the cluster. Let’s use grafana.my-domain.com as an example.
Apart from all the obvious spec configuration as described by the Kubernetes Ingress documentation, we also have to specifically set a few special annotations on this Ingress resource, instructing the ingress-nginx controller to require authentication for all traffic related to that Ingress. These are nginx.ingress.kubernetes.io/auth-signin and nginx.ingress.kubernetes.io/auth-url, pointing them to the oauth2-proxy.
We also set cert-manager.io/cluster-issuer to the ClusterIssuer we’ve created previously. Cert-Manager will automatically handle certificate creation and TLS secret management for all Ingress resources with this annotation.
grafana-ingress.yml
---
apiVersion: networking.k8s.io/v1
kind: Ingress
metadata:
  name: grafana
  namespace: grafana
  annotations:
    # enforce TLS/HTTPS
    nginx.ingress.kubernetes.io/ssl-redirect: "true"
    nginx.ingress.kubernetes.io/force-ssl-redirect: "true"
    # instruct ingress-nginx to use oauth2-proxy for traffic authentication/authorization
    nginx.ingress.kubernetes.io/auth-signin: "https://oauth2-proxy.my-domain.com/oauth2/start"
    nginx.ingress.kubernetes.io/auth-url: "https://oauth2-proxy.my-domain.com/oauth2/auth"
    # instruct ingress-nginx and cert-manager to use the clusterissuer we've created earlier for TLS certificates
    cert-manager.io/cluster-issuer: "lets-encrypt"
spec:
  ingressClassName: nginx
  tls:
  - secretName: grafana-ingress-tls
    hosts:
    - grafana.my-domain.com # what certificate should cert-manager request from Let's Encrypt
  rules:
  - host: grafana.my-domain.com
    http:
      paths:
      - path: /
        pathType: Prefix
        backend:
          service:
            name: grafana
            port:
              number: 80
Once the grafana-ingress.yml has been applied to Kubernetes, cert-manager should have automatically requested and created a valid Let’s Encrypt certificate for our domain, grafana.my-domain.com in this example.
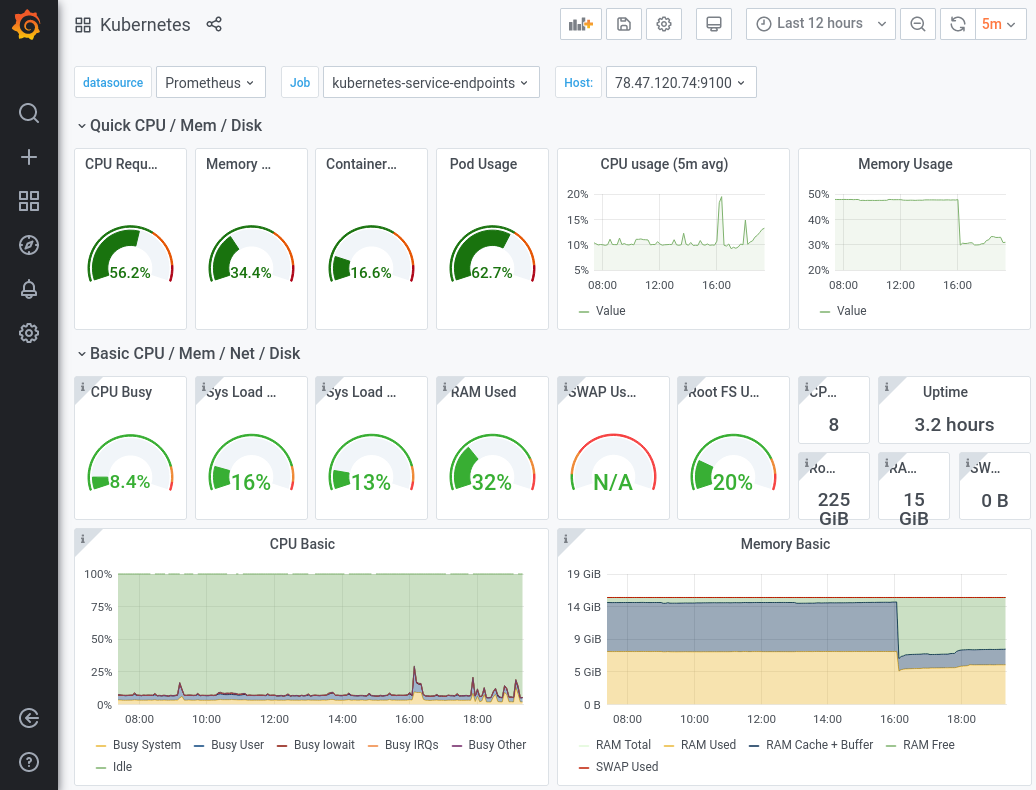
You should now be able to reach Grafana by opening the browser and going to https://grafana.my-domain.com.
When doing so, you’ll be greeted automatically by a login page from GitHub, since any traffic going to grafana.my-domain.com first has to pass the authentication process provided by the previously deployed oauth2-proxy:

And there we go, after a successful login via GitHub account you can now access and see your Grafana dashboards: